
1. Making a Curved Tarhu Cone - type #3
This post outlines one method of making a type 3 cone. For an explanation of types, see Post #3
This cone uses very thin strips of western red cedar (0.7 mm) which are bent to shape using dry heat. The individual cone segments are glued together using titebond glue. The joints between the segments are un-reinforced butt joints.
Two moulds are needed: a mould which is used to accurately trim the bent cone-segments to the desired angle; a turned mould which is used to assemble the trimmed segments into a cone shape.
A template of the desired cone shape is used to set out the moulds.

1. The assembly mould has been turned on a lathe then marked out in 12 segments of 30 degrees each.

2. A block of cherrywood has been marked out with a 30 degree wedge

3. The wedge has been cut out using a bandsaw

4. The wedge is planed flat, making sure it is an accurate 30 degrees

5. The offcuts are kept so that........

6. One of the off-cuts can be taped back on to the wedge so that the wedge centreline is parallel to the bandsaw table

7. The cone profile is traced onto the wedge from the template

8. The wedge is ready to cut exactly along the drawn line (careful - no clean up of the bandsaw cut)

9. A piece of cardboard is clamped between the 2 sections of the trimming mould and the shape is traced.

10. Assembly mould, trimming mould and rib template

11. A block of quarter-sawn western red cedar is sawn into strips 1.0mm thick

12. Each strip is long enough for 2 ribs, so 6 strips are needed.

13. An adjustable drum sander is used to thickness all of the strips
14. All strips are thicknessed to 0.7 mm

15. The strips have been cut to length and marked out with the rib template

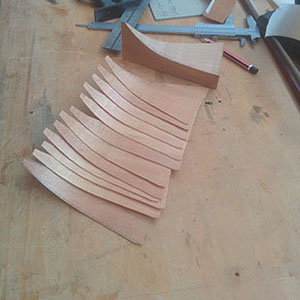
16. The 12 rib-blanks have been taped together then cut on a bandsaw. Cut about 1 mm outside the line

17. All ribs cut out and ready for bending
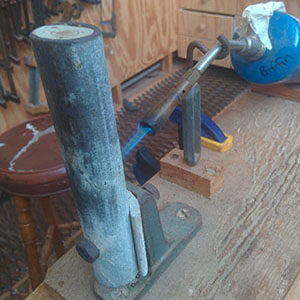
18. A simple bending iron using a piece of iron pipe and a gas burner

19. Each rib is pushed against the pipe until the desired curve is reached
20. All ribs bent ready for trimming
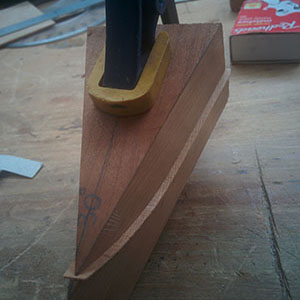
21. Each rib is squeezed between the two halves of the trimming mould

22. The rib is trimmed by holding a small plane against the bottom half of the mould

23. The rib is now flush with the bottom section. Note that the width of the upper section of the mould has been trimmed around 2mm so that it doesn't interfere with the trimming

24. The trimmed ribs can now be assembled. Masking tape is used to hold them together

25. Half way!

26. All ribs assembled. The last rib usually has to be fitted individually. It is better to leave it untrimmed in case more width is needed

27. The tape has been removed and the cone lightly sanded. A 1 6mm button of western red cedar has been glued onto the apex of the cone. For a kamancheh tarhu size cone, cone plus button weighs 12 gms with the effective cone area weighing around 7 gms
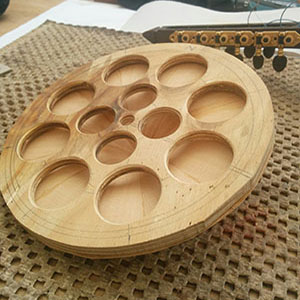
28. A cone disc has been glued onto the edge of the cone. The disc is made from 13 mm pine plywood

29. The finished cone has been stained black ready for mounting in the instrument
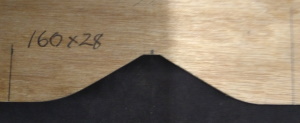
30. 18 months after this post was written, this profile for a 160 mm x 28 mm type 3 kamancheh tarhu/shahkaman cone was found to be better than the profile used in the other pics above. See Post #3 for some more detail on using this cone design, especially in relation to wolf notes……..will add more info here soon